Have you ever wondered how to transform your driveway into a stunning and durable surface that will make you feel like you truly belong? Well, you’re in luck! In this guide, we will take you through the complete resin driveway installation process, step by step. From site preparation to the finishing touches, you’ll learn everything you need to know to create a beautiful and long-lasting driveway. Get ready to roll up your sleeves and embark on this exciting journey. By the end, you’ll have a driveway that not only enhances the curb appeal of your home but also gives you a sense of pride and belonging every time you pull in. Let’s get started!
Key Takeaways
- Clear the area and remove vegetation, rocks, and debris.
- Select the appropriate edging material to define boundaries and prevent resin spread.
- Properly mix and apply the resin to ensure durability and curing.
- Regularly maintain and clean the resin driveway to prevent damage and enhance longevity.
Site Preparation
Before beginning the installation process of your resin driveway, it is crucial to ensure thorough site preparation. This step is essential as it sets the foundation for a long-lasting and visually appealing driveway. Proper site preparation not only enhances the overall aesthetics of your property but also minimizes the need for future driveway maintenance.
To start, clear the area and remove any existing vegetation, rocks, or debris. This will provide a clean and level surface for the resin driveway installation. You can also take this opportunity to evaluate your landscaping ideas and make any necessary adjustments.
Next, it is important to assess the drainage of the site. Ensure that the area slopes away from your home to prevent water from pooling on the driveway. Proper drainage will help to prevent damage to the resin surface and prolong its lifespan.
Afterward, it is recommended to compact the soil to create a stable base. This can be done using a plate compactor or by simply walking over the area. A compacted soil base will provide a solid foundation for the resin driveway and prevent any sinking or shifting in the future.
Lastly, apply a weed killer or weed membrane to inhibit weed growth. This will help to maintain the pristine appearance of your resin driveway and minimize the need for regular maintenance.
Excavation and Base Preparation
Once you have completed the site preparation, it is time to move on to the excavation and base preparation for your resin driveway installation. Excavation is a crucial step as it ensures a stable foundation for your driveway. To begin, you will need to mark the area where the driveway will be installed and remove any existing materials, such as grass or soil, within that area. Excavation techniques can vary depending on the size and shape of your driveway, but typically involve using a mini digger or shovel to dig up the ground to a specific depth.
After excavation, the next step is to prepare the base for your resin driveway. Base material selection is essential for a durable and long-lasting driveway. The most common base materials used for resin driveways are crushed stone or MOT Type 1 sub-base. These materials provide a solid foundation and help with drainage. Once the excavation is complete, the chosen base material is then spread and compacted using a plate compactor. This ensures that the base is level and stable, ready for the resin to be laid.
Excavation and base preparation are critical steps in the installation process of a resin driveway. Following proper excavation techniques and selecting the right base material will help ensure that your driveway is strong, durable, and able to withstand the test of time.
Edging Installation
Now that you have completed the excavation and base preparation for your resin driveway, it’s time to move on to the next step: edging installation. Edging plays a crucial role in the durability and aesthetics of your driveway. There are various types of edging available, including concrete, brick, and plastic, each with its own benefits and considerations. In this section, we will discuss the different types of edging, the benefits they offer, and provide you with some installation tips to ensure a successful and long-lasting result.
Types of Edging
To install the edging for your resin driveway, you will need to carefully select from a variety of options available to you. Here are some different edging materials and cost-effective edging options that you can consider:
- Concrete Edging: This is a popular choice due to its durability and versatility. It can be molded into different shapes and sizes to suit your driveway design.
- Block Paving Edging: Made from individual blocks, this type of edging offers a classic and elegant look. It is available in various colors and patterns, allowing you to create a unique border for your driveway.
- Timber Edging: If you prefer a more natural and rustic look, timber edging can be a great option. It is affordable and easy to install, adding a warm touch to your resin driveway.
- Metal Edging: For a modern and sleek appearance, metal edging can be an excellent choice. It is durable, low-maintenance, and provides a clean finish to your driveway.
Benefits of Edging
To maximize the visual appeal and functionality of your resin driveway, it is essential to understand the benefits of edging and the installation process. Edging plays a crucial role in defining the boundaries of your driveway and providing a neat and finished look. It helps to prevent the resin from spreading onto the surrounding areas, keeping the driveway in its designated space. Additionally, edging enhances the durability of the driveway by providing extra support and preventing the edges from cracking or crumbling over time. When it comes to edging material options, you have several choices. Common options include concrete, block paving, and natural stone. Each material offers its own unique aesthetic and durability, allowing you to choose the best option that suits your style and budget.
Installation Tips
Start by carefully excavating the area where the edging will be installed. This will ensure a stable foundation for the edging and prevent any shifting or movement. Once the area is excavated, follow these installation techniques to achieve a professional and long-lasting result:
- Use a string line to ensure straight edges.
- Secure the edging firmly in the ground using stakes or screws.
- Check the level of the edging to ensure it is even and properly aligned.
- Use a mallet or rubber hammer to tap the edging into place if needed.
Avoid these common mistakes during the installation process:
- Failing to properly secure the edging, which can lead to shifting and unevenness.
- Neglecting to check the level of the edging, resulting in an unattractive and unstable driveway.
- Rushing the installation process, which can lead to mistakes and a subpar outcome.
- Overlooking the importance of excavating the area properly, which can cause issues down the line.
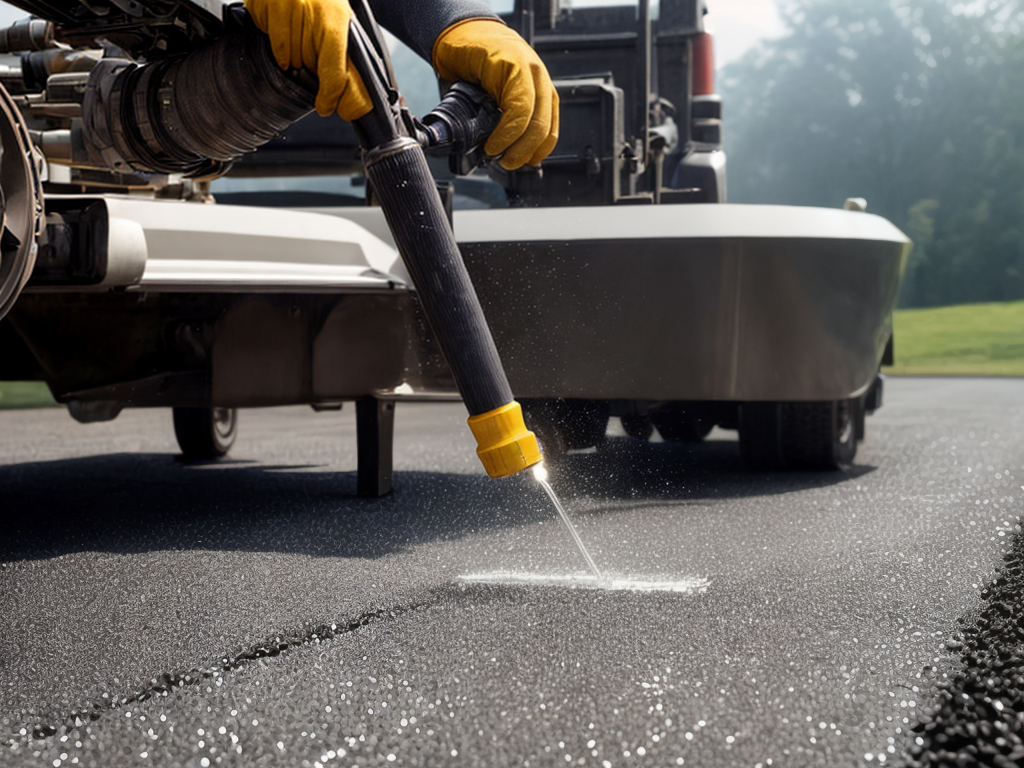
Resin Mixing and Application
To ensure a successful resin driveway installation, it is crucial to understand the process of resin mixing and application. First, you need to carefully measure and mix the resin and hardener according to the recommended ratios. This ensures proper curing and durability of the surface. Once the resin is mixed, you can begin applying it to the prepared area, using a squeegee or roller to create a smooth and even surface.
Mixing Resin Ratios
Once you have gathered all the necessary materials and tools, it is important to understand the proper resin mixing ratios for a successful driveway installation. Mixing resin ratios correctly ensures the durability and longevity of your resin driveway, minimizing the need for frequent maintenance. Here are four crucial points to consider:
- Resin to hardener ratio: Maintaining the correct ratio of resin to hardener is crucial for achieving the desired strength and durability. Follow the manufacturer’s instructions carefully to ensure accurate measurements.
- Thorough mixing: Properly mix the resin and hardener together using a drill with a paddle attachment. Make sure to scrape the sides and bottom of the container to ensure a consistent mixture.
- Working time: Be mindful of the working time specified by the manufacturer. Once the resin is mixed, it has a limited time before it begins to cure.
- Temperature considerations: The temperature of the environment and the resin components can affect the curing process. Follow the guidelines provided by the manufacturer to ensure optimal curing conditions.
Applying Smooth Resin Surface
To apply a smooth resin surface, you need to mix the resin and hardener thoroughly according to the correct ratios explained in the previous subtopic. Once you have the mixture ready, follow these steps to achieve a seamless finish. First, pour the mixed resin onto the prepared surface. Use a squeegee or trowel to spread it evenly, ensuring that all areas are covered. Work in small sections to prevent the resin from drying too quickly. Smooth out any imperfections or air bubbles using a roller or brush. Allow the resin to cure for the recommended time, usually around 24-48 hours. Once the surface is fully cured, it is important to perform regular resin surface maintenance to keep it in optimal condition. This includes regular cleaning to remove dirt and debris, as well as inspecting for any cracks or damage. If you notice any cracks, it is essential to repair them promptly to prevent further deterioration. Use a resin repair kit, following the manufacturer’s instructions, to fill the cracks and restore the surface to its original smoothness.
Curing and Finishing Touches
After the resin application, you will need to allow for the curing process and then add the finishing touches to your driveway. Here are the steps you need to follow:
- Curing Techniques: The curing process is crucial for the resin to harden and bond properly. Depending on the type of resin used, curing times may vary. It is essential to follow the manufacturer’s instructions and allow sufficient time for the resin to cure.
- Cleaning: Once the resin has cured, you should clean the surface to remove any loose particles or debris. Use a broom or a leaf blower to sweep away dirt and leaves. For more stubborn stains, you can use a mild detergent and a soft brush to scrub the area gently.
- Sealing: To protect your newly installed resin driveway, consider applying a sealer. A sealer acts as a barrier against stains, UV rays, and other external factors that may damage the surface. Ensure the driveway is clean and dry before applying the sealer according to the manufacturer’s instructions.
- Final Touch Ups: Take a step back and inspect your driveway for any imperfections. If you notice any areas that require attention, such as unevenness or minor cracks, you can use a resin repair kit to fix them. Follow the instructions provided with the repair kit carefully.
Maintenance Tips and Recommendations
Now that your resin driveway is properly cured and finished, it’s time to discuss how to effectively maintain it. Keeping your resin driveway clean and preventing weed growth are essential for maintaining its appearance and durability. Here are some maintenance tips and recommendations to help you keep your resin driveway looking its best.
- Regular Cleaning: Regularly clean your resin driveway to remove dirt, debris, and stains. Use a mild detergent and warm water to scrub the surface using a stiff brush. Rinse thoroughly with clean water to ensure all soap residue is removed.
- Avoid Harsh Chemicals: Avoid using harsh chemicals or solvents when cleaning your resin driveway, as they can damage the surface. Stick to mild cleaners and avoid abrasive tools that could scratch the resin.
- Preventing Weed Growth: To prevent weed growth, regularly inspect your driveway for any signs of weeds or vegetation. Remove any weeds manually or use an appropriate weed killer, taking care to follow the instructions carefully.
- Protect Against Stains: To protect your resin driveway against stains, promptly clean up any spills, such as oil or grease. Use a degreaser specifically designed for resin surfaces and follow the manufacturer’s instructions.
- Regular Maintenance: Inspect your resin driveway regularly for any cracks or damage. Address any issues promptly to prevent further damage and extend the lifespan of your driveway.
Conclusion
In conclusion, the process of installing a resin driveway involves thorough site preparation, excavation, and base preparation. Edging installation is then followed by resin mixing and application. After the curing process and finishing touches, proper maintenance is crucial to ensure the longevity and appearance of the driveway. By following these step-by-step instructions and implementing regular maintenance, you can enjoy a beautiful and durable resin driveway for years to come.